Mastering Global Fonts in JupiterX
A commanding visual presence is key to a successful website, and it's not just images and color schemes that create this impact—typography plays a pivotal role, too. With JupiterX, you have access to Global Fonts, a powerful feature to streamline and harmonize the typography across your site. This detailed guide will walk you through the process of utilizing the Global Fonts feature, ensuring that your website's typography echoes your brand identity with consistency and elegance.
Accessing Your Site’s Global Fonts
Initiating your journey with Global Fonts is straightforward:
- From your WordPress dashboard, open any page in Elementor by clicking "Edit with Elementor."
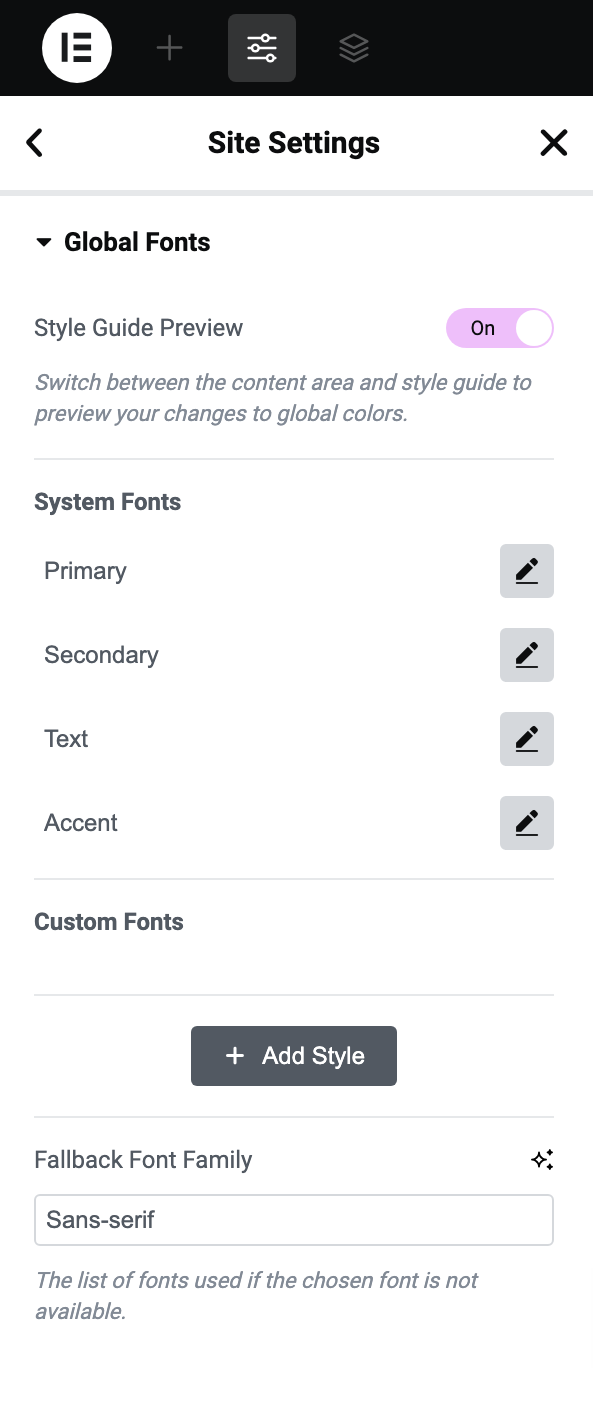
- Click on the Site Settings icon located at the top of the Elementor sidebar.
- From Site Settings, find and click on "Global Fonts."
Here, you'll see a rundown of fonts utilized across your website. This centralized hub allows you to modify your typography settings efficiently.
Please Note: To preview your fonts live, activate the Style Guide Preview from the side panel in the WordPress dashboard.
Editing Your Site’s Global Fonts
Fine-tuning your typography is simple in JupiterX:
- In the Global Fonts settings, hover over the font you wish to edit, and click the pencil icon that appears.
- To delete a font, click the "X" icon next to the font name. Note that system fonts are permanent fixtures and cannot be deleted. Please note that you can not delete system fonts.
- For repositioning, use the six-dot icon to drag and drop fonts in the order that suits your preference.
- By clicking on the pencil icon (edit), you can delve into a multitude of settings affecting the look and feel of your font—size, weight, transform, style, and more.
After making adjustments, click "Save Changes" to impart these modifications across your site.
Changing the Name of a Global Font
Renaming a font can help you manage your typography assets better:
- Click on the existing font name.
- Type in the new, preferred name.
Adding a New Global Font
Should you need more variety in your typography:
- Scroll to the bottom of the Global Fonts section and hit "Add Style".
- A dialog box will appear prompting you to define the characteristics of your new font.
When adding a font, you're not limited to basic selections—the functionality goes further:
- Family: Select from the dropdown options available in the font family.
- Size: Specify the text size through various units like pixels (px) or EM.
- Weight: Choose the boldness/weight of the font, ranging widely from 100 to 900.
- Transform: Opt for uppercase, lowercase, or capitalize to craft visual hierarchy.
- Style: Italicize or tilt your text for emphasis or formality.
- Decoration: Embellish with underlines, overlines, or strikethroughs for effect.
- Line-Height: Adjust the leading of your text to improve readability and fit.
- Letter Spacing: Gain precise control over the distribution of text.
- Word Spacing: Modify the default spacing between words for better readability.
Save each step diligently to ensure the changes are reflected.
Mastering JupiterX's Global Fonts is like owning the rhythm of your site's visual language. Whether reinforcing a branding message or constructing a visually cohesive narrative, the control you have over typography with Global Fonts is pivotal.
By conforming to this guidance, you'll streamline your design process and offer visitors a consistent and enjoyable user experience. Embrace the power of typography in JupiterX and watch as it elevates your digital presence to new heights.